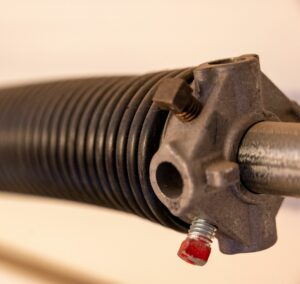
Garage door springs allow you to leave and return home every day easily. Traveling to and from your home and keeping your property safe would be quite tricky without them. However, garage door springs only work as well as they are maintained. There are many routines involved in maintaining garage door springs, with lubrication being one of the most vital. If you’d like to save time and money by taking care of this task yourself, you can read this blog and learn how to lubricate garage door springs.
How To Lubricate Garage Door Springs
Following these steps will ensure that you successfully care for your garage door springs. Read and start learning how to lubricate garage door springs.
1. Choose The Right Lubricant
Before you can start lubricating your garage door springs, you need to find the right lubricant. Silicone and lithium are the two types of lubrication most commonly used on garage door parts. Most experts recommend using a silicon-based spray lubricant for garage door springs. Unlike lithium, silicone doesn’t trap debris as easily. Keep in mind that, despite what some online sources might say, WD-40 should never be used to lubricate garage door parts because it traps dirt and attracts it. Aside from lubricant, you’ll also need a rag or washcloth, water, regular dish soap, a ladder, and other safety equipment to start working.
2. Turn Off And Disconnect The Opener
For your safety, turn off and disconnect your garage door opener so you don’t accidentally set it off while lubricating the garage door springs. You won’t be able to learn how to lubricate garage door springs if you sustain an injury from a garage door that wasn’t completely shut off. Once this step is done, you can carefully begin the next step of learning how to lubricate garage door springs.
3. Clean The Springs
Before lubricating the garage door springs, take time to clean them first. Your garage door’s torsion springs are located above the garage door in the center. If there’s any visible gunk or dirt, wipe those away first. Afterward, use water and soap to clean the springs. Take time to dry the springs so that the lubricant can effectively work its magic.

4. Lubricate The Springs
Now it’s time for the main event of how to lubricate garage door springs. If you’re using silicone spray, you’ll apply the lubricant all over the springs without leaving any excess. However, if lithium grease is your choice of lubricant, you’ll apply the grease with a brush or other appropriate applicator and be mindful to avoid adding too much of it. Should any excess lubricant appear, take time to wipe it away. Before starting this task, read the last two steps of how to lubricate garage door springs.
5. Manually Open And Close The Door
If you’re able to do so safely, test out your garage door by manually opening and closing it. Listen to it as it moves. If no strange or loud noises are produced, your garage door is in good shape. However, if your garage door is still making noise during operation, another problem might need addressing. If you aren’t entirely confident in your ability to perform this manual test, skip to the final step.
6. Reconnect To The Opener
For this last step in how to lubricate garage door springs, reconnect your garage door opener to its power source and turn it on again. As with the previous step, pay attention to how your garage door operates with newly lubricated springs.
Our Technicians Perform Spring Repairs!
By following these instructions for how to lubricate garage door springs, you’ll be able to take care of this vital garage door maintenance task without needing to call for help. That said, your garage door springs might be old or rusty. Old or rusty springs need repairing or replacing as soon as possible to reduce any danger to yourself, others, and your property. Luckily, if you live in Alvin, Texas, you can contact us at Garage Door Repair Alvin to receive our highly-experienced technicians’ best spring repair and replacement services.


